99客服系统源码部署教程详解
支持PHP+MySQL环境,兼容宝塔/Nginx/Apache,提供一键安装、微信公众号/小程序对接、AI智能机器人客服等功能,助您快速搭建高效在线客服系统。
安装
环境要求:php>=8.1, MySQL 5.7
宝塔安装
推荐nginx+php-fpm模式
1、新建站点后网站目录配置参考如下
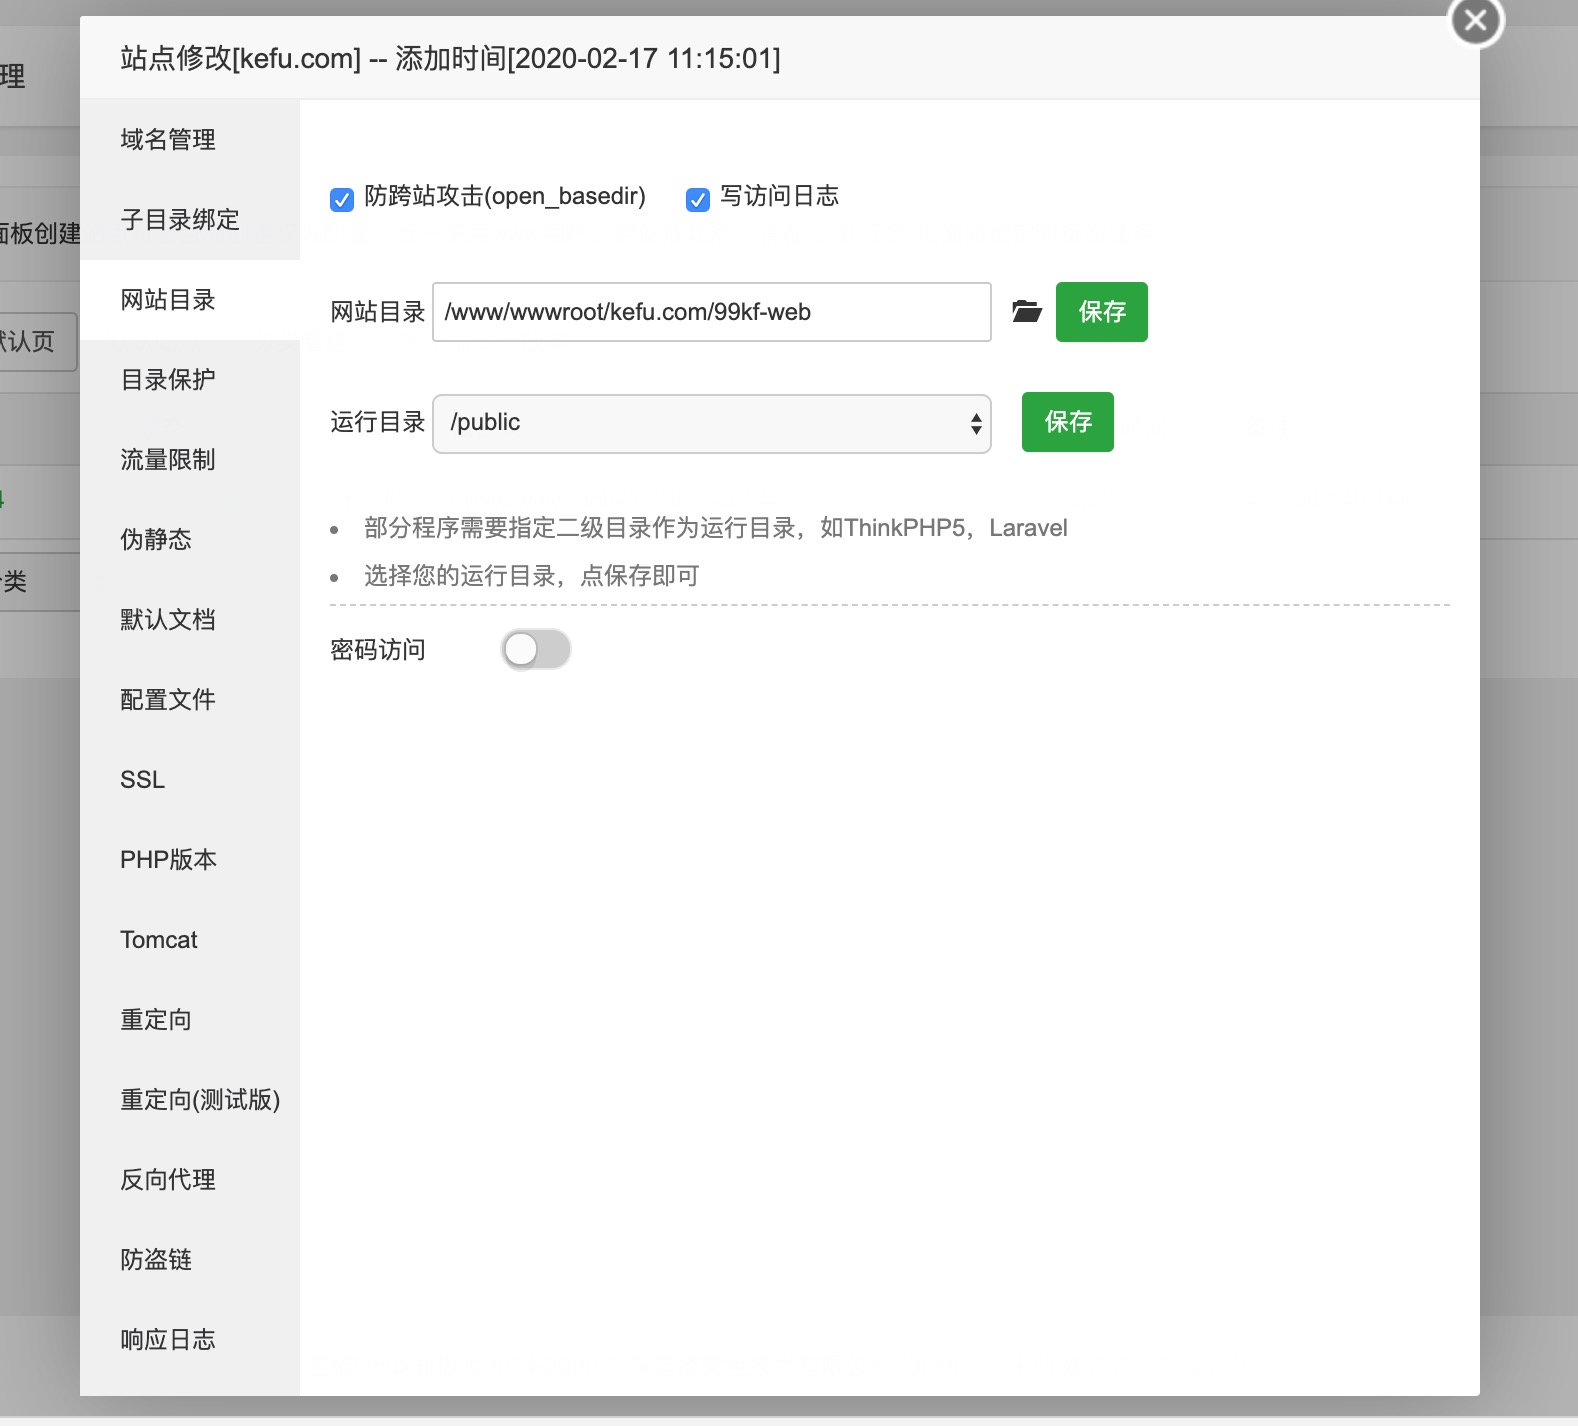
注意:网站目录指向99kf-web,运行目录指向/public。
2、配置文件配置

在如图箭头位置加入以下配置:
    location /kf/h5 {
      try_files $uri $uri/ /kfh5.html?$args;
    }

    location /kf/web {
      try_files $uri $uri/ /kfweb.html?$args;
    }

    location /h5 {
      try_files $uri $uri/ /h5.html?$args;
    }

    location /web {
      try_files $uri $uri/ /web.html?$args;
    }

    location / {
        if (!-e $request_filename) {
            rewrite ^/index.php(.*)$ /index.php?s=$1 last;
            rewrite ^(.*)$ /index.php?s=$1 last;
            break;
        }
    }

    location ~* \.(eot|ttf|woff)$ {
        add_header Access-Control-Allow-Origin *;
    }

    location ~ \/static\/.*\.php {
        deny all;
        return 404;
    }

    location ~ \/upload\/.*\.php {
        deny all;
        return 404;
    }
完整配置示例:
server
{
listen 80;
server_name 99kf.com;
index index.php index.html index.htm default.php default.htm default.html;
root /www/wwwroot/99kf.com/99kf-web/public;
# 此处省略SSL等标准配置...
#######################################
# 插入上述location配置
#######################################
#PHP配置
include enable-php-56.conf;
# 其他标准配置...
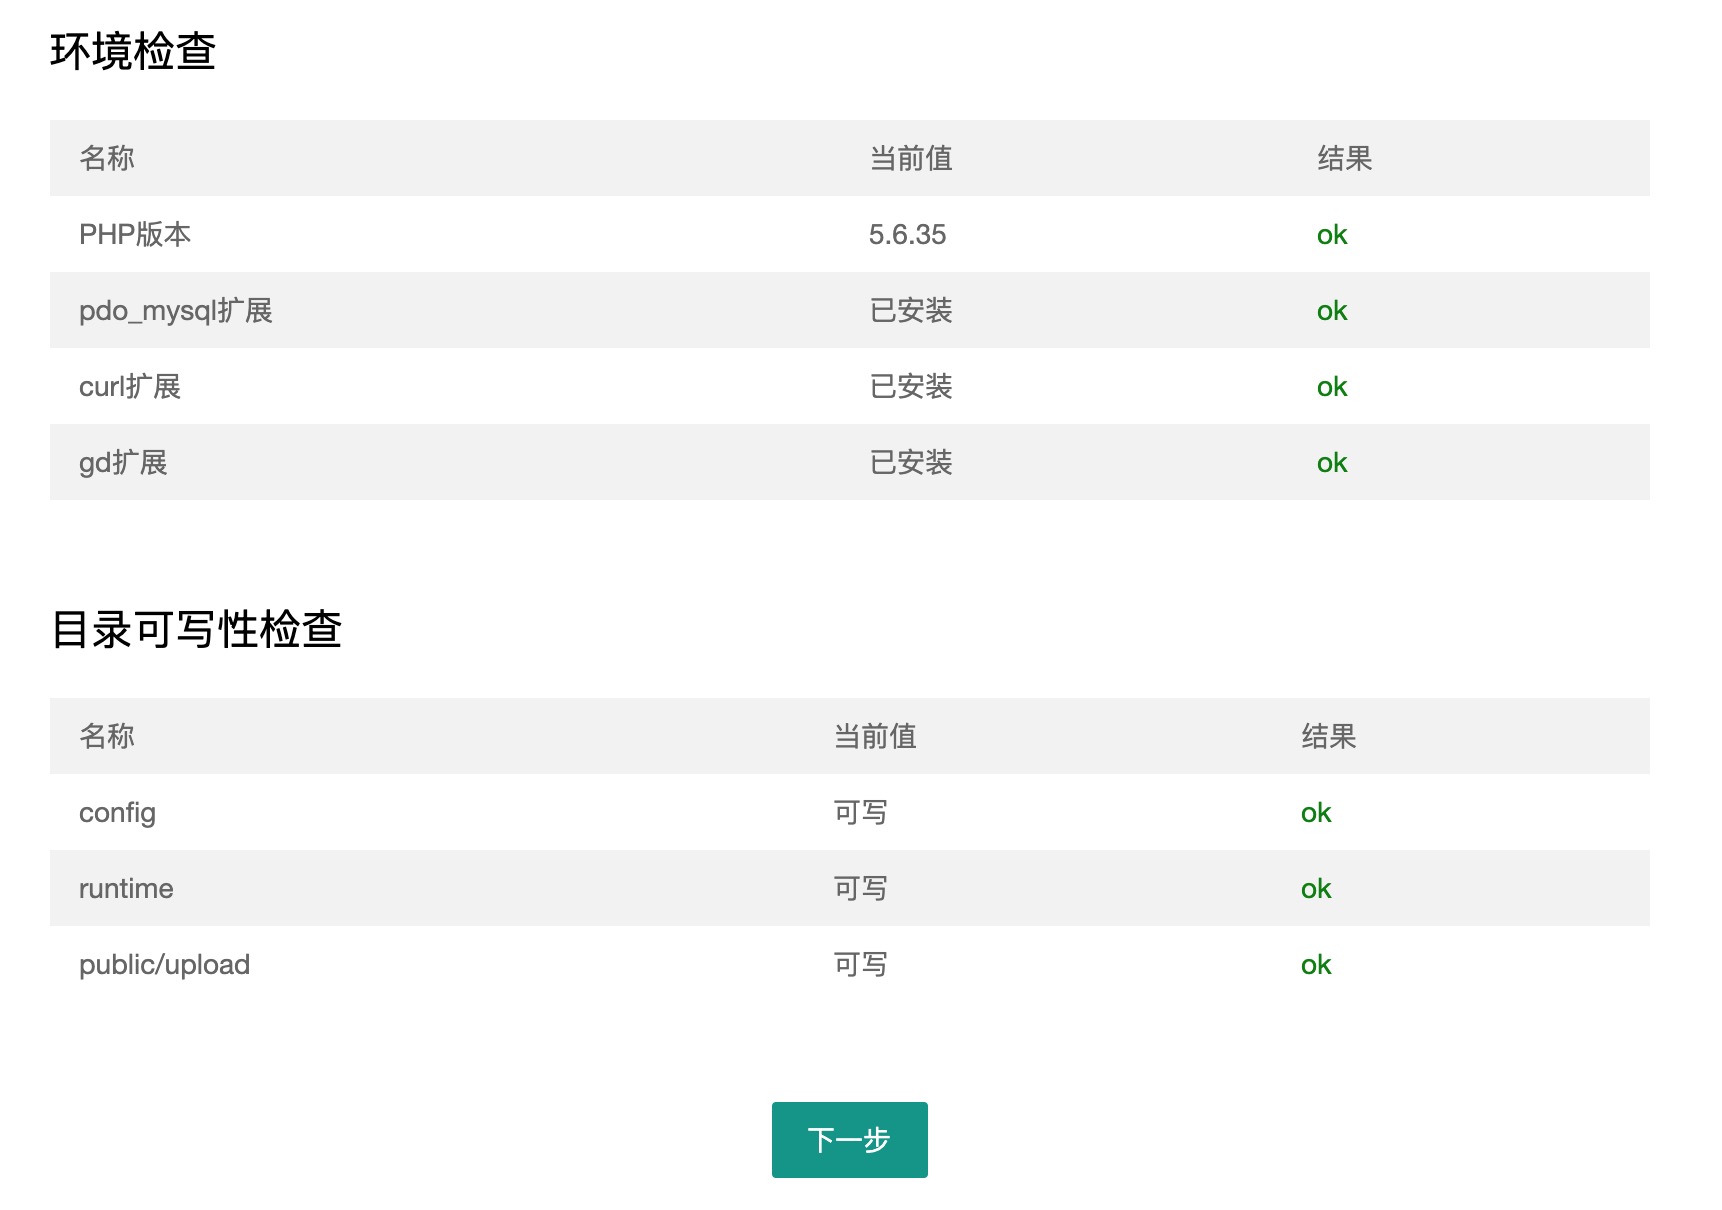
}3、访问 http://你的域名.com/install.php
根据步骤检测环境并填写数据库配置即可完成安装。安装页面类似:
安装完毕即可使用在线客服系统源码的全部功能,如需了解详细功能可查看客服系统源码功能列表。
非宝塔环境 nginx配置参考
server {
    listen 80;
    server_name  99kf.com;
    root 实际磁盘路径/99kf-web/public;
    client_max_body_size 18M;

    # 此处插入与宝塔相同的location配置
    # ...

    location ~ \.php$ {
       fastcgi_pass    127.0.0.1:9000;
       include fastcgi_params;
       fastcgi_param SCRIPT_FILENAME $document_root$fastcgi_script_name;
    }
}
2、修改php.ini:
upload_max_filesize = 20M
post_max_size = 20M
重启php-fpm生效
3、访问安装页面完成配置
如需对接公众号/小程序,可参考微信小程序/公众号客服设置
非宝塔环境 apache配置参考
<Directory "实际磁盘路径/99kf-web/public">
     Header set Access-Control-Allow-Origin "*"
     Options Indexes MultiViews
     AllowOverride All
     Require all granted
 </Directory>
 <VirtualHost *:80>
     DocumentRoot "实际磁盘路径/99kf-web/public"
     ServerName popoim.com
 </VirtualHost>
2、php.ini修改同nginx方案
3、通过 http://域名.com/install.php 完成安装
安装后建议配置AI智能机器人客服提升服务效率。
客服系统源码购买地址
部署完成后,可继续学习如何快速接入客服系统